March 18, 2018
Level up your terminal game with iTerm2’s Hotkey Window and text settings
Occasionally, I’ll be talking with someone as I’m on my computer, and I pull up my terminal to enter a git command or something similar. If they use the terminal a lot but haven’t seen or tried the “hotkey window” in a terminal before, they sometimes react with, “wait – what the heck was that??” I remember when I first had that reaction, too, and I was glad when someone showed me how to look and feel like an elite hacker.
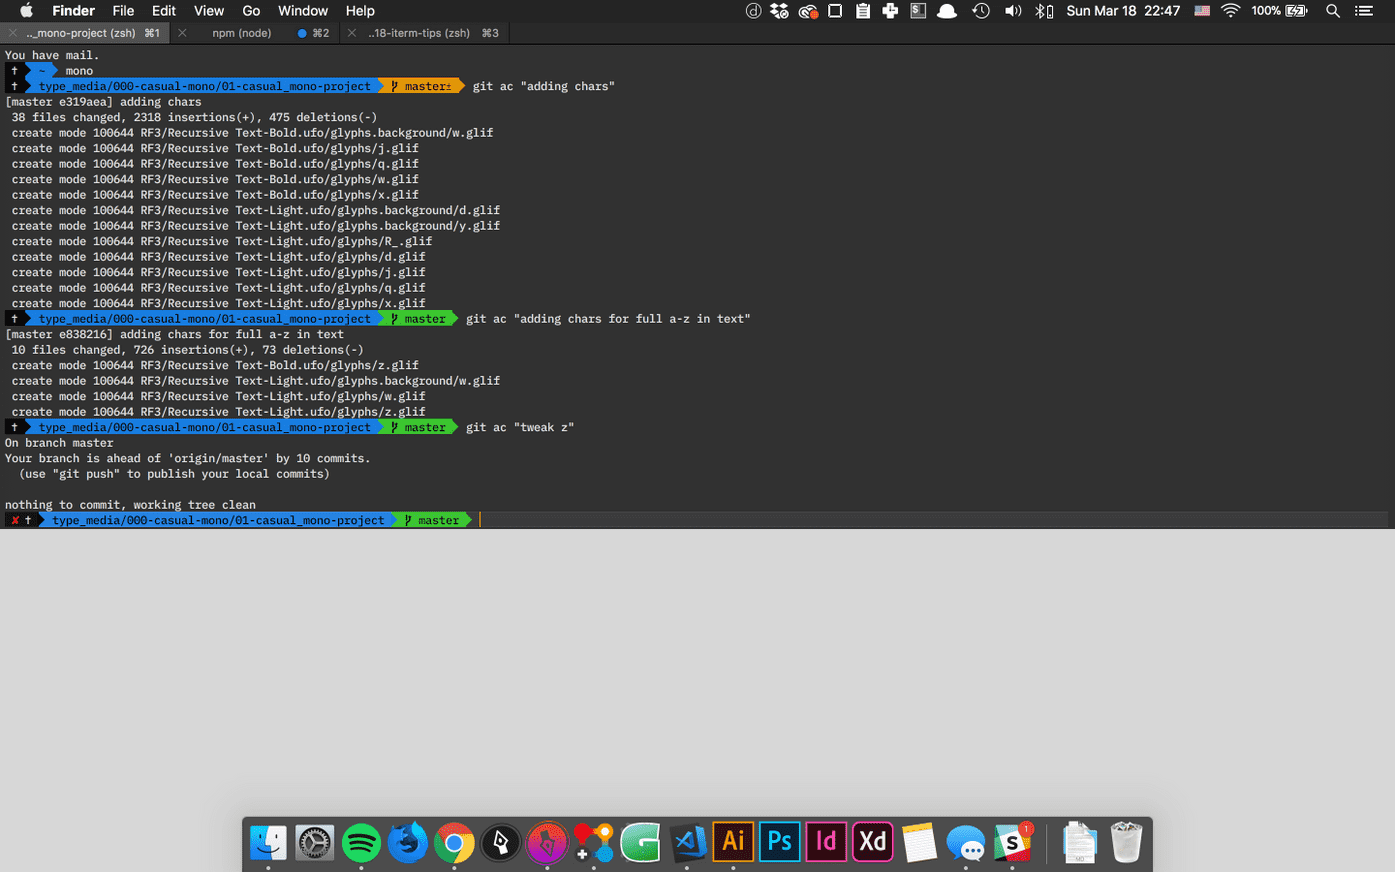
The secret is iTerm2, “a terminal emulator for macOS that does amazing things,” according to its website. It’s super-customizable, and even though Hyper terminal is more trendy these days, the hotkey window in iTerm2 works so much more smoothly than anything else I’ve tried. I love using multiple macOS spaces while I work, often using a web browser in one space, a code editor in another, and visual design tools in more spaces. With a hotkey window, I have a convenient terminal always at the ready, without worrying about switching my current space to enter a quick command.
How to get iTerm and set up the “Hotkey Window”
Let’s set up the hotkey window:
- Download iTerm2, unzip it, move it to your applications folder, and right-click to open it.
- Open the iTerm2 Preferences (It has a lot of settings, so in the past, setting it up on new computers has taken me some time to figure out again. That’s partly why I’m writing this guide). Since you’ll be opening up the settings a lot while you set things up, remember that you can access Preferences with the shortcut
command+,. - Go to the Profiles tab. Something quirky about iTerm2 is that it has overall settings plus “Profiles” which you can set up with different collections of settings – you can reconfigure every setting for each profile. This may seem complicated at first, but it’s useful in that it allows you to experiment with different setups. You could even use a completely different style of terminal based on what type of work you were doing, if you really live in the terminal. Anyway, for now we will simply set up a single profile to have a Hotkey window.
- Go to the Keys section of the Profiles tab.
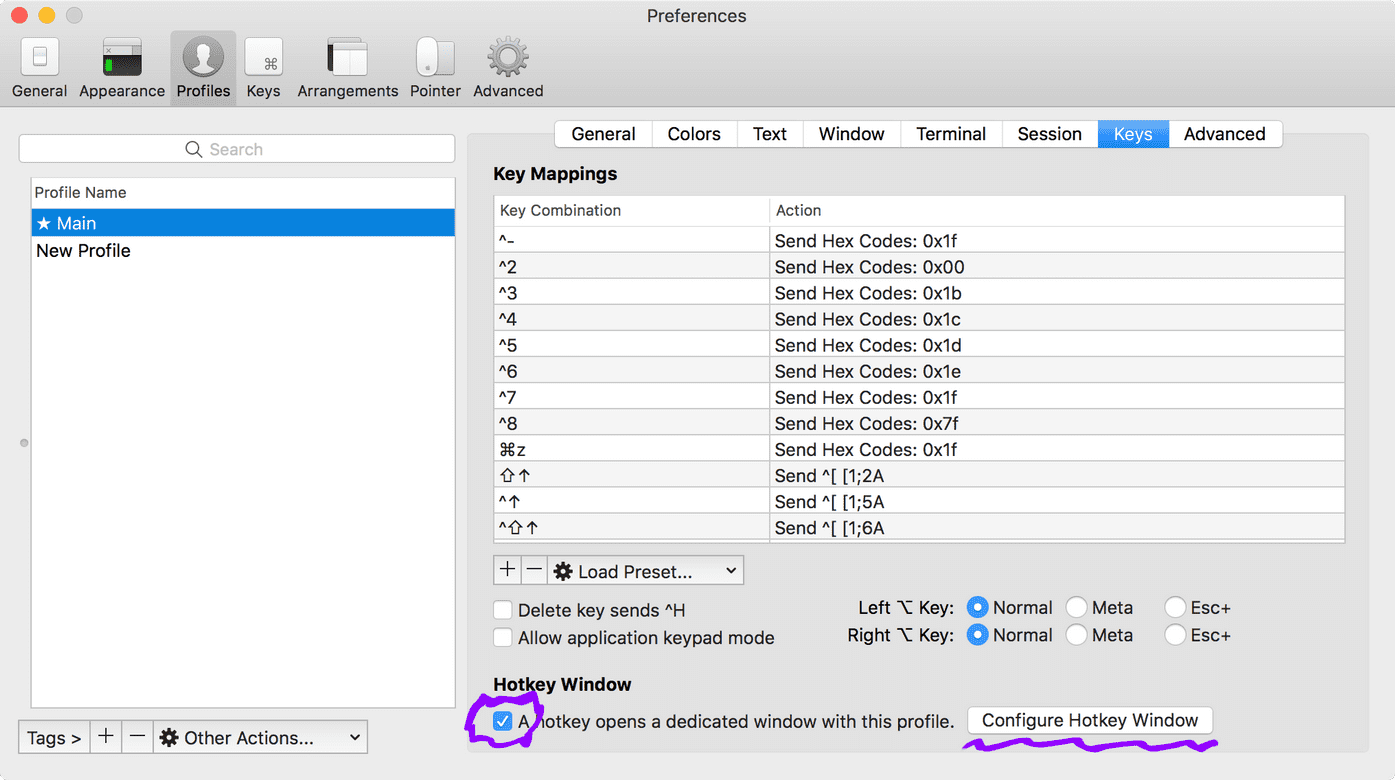
- While you’re in the Keys section, check the box in the “Hotkey Window” section.
- Now, click the button labeled “Configure Hotkey Window…”
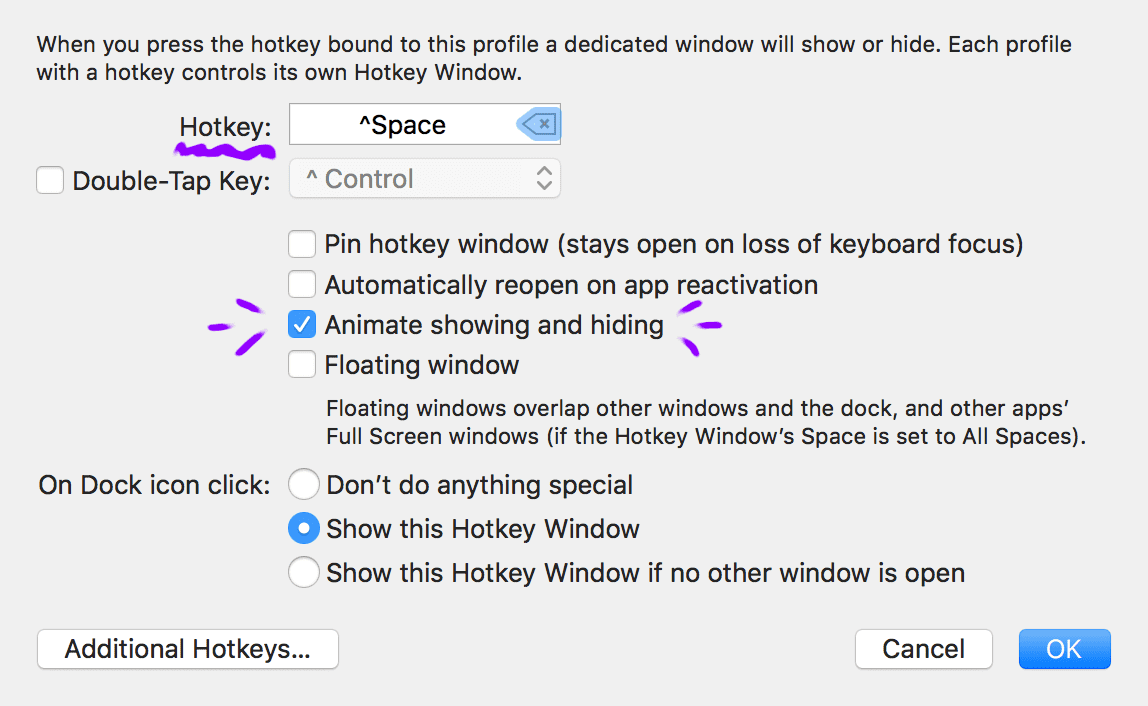
- A panel with options slides down. Use “click to set” the Hotkey, then hit your desired key combo. I use control+space for my hotkey combo, because it’s easy to hit with one hand, and it’s right next to my Alfred app hotkey.
- You can select other options, if you want. I personally like to select “Animate showing and hiding,” and I don’t find that the “Floating window” works very well (it stays behind my other windows, for whatever reason).
Make iTerm open on Login to prevent double-window confusion later
- The last step to making this hotkey window work well is to make sure iTerm2 launches when you boot up your computer, but also that it launches in a hidden state. Otherwise, you’ll get a non-hotkey window when you boot it up, and you will have two iTerm2 windows to deal with, which can be confusing and annoying. To do this:
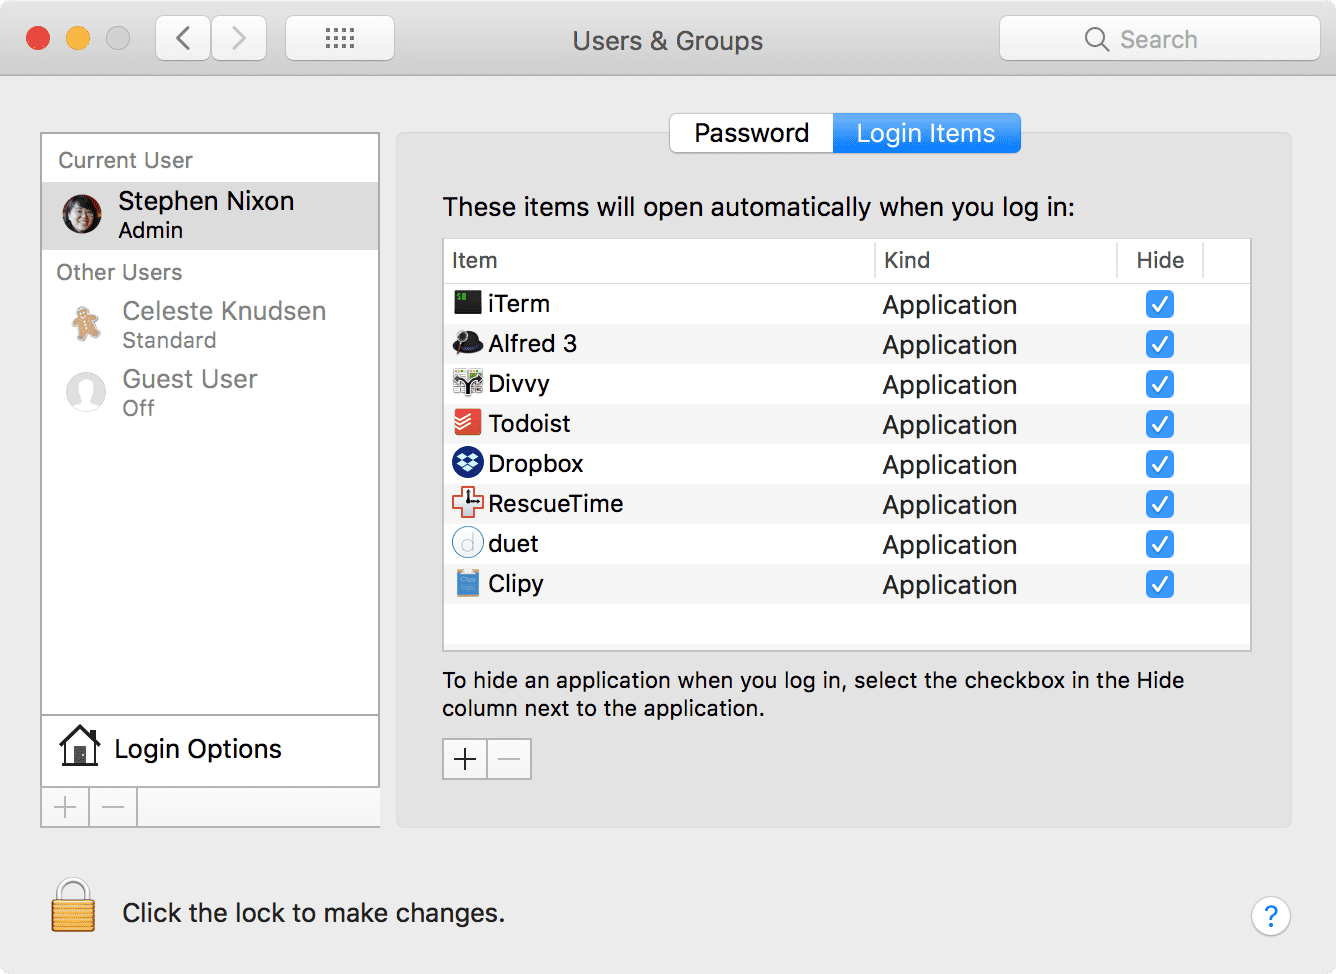
- Open your mac System Preferences, then go to Users & Groups.
- Go to the Login Items tab. These are all the apps that will start when you log into your mac user profile.
- Click the
+button to add an item to this list, then navigate to your Applications folder and select iTerm. - Mark the checkbox to “Hide” iTerm on log in. If you haven’t already done so, I highly recommend hiding all your login items so you aren’t greeting with a bunch of windows each time you power up your computer.
Well done! You should now be able to pull open your terminal with the quick press of a hotkey, and impress your friends with your elite hacking skills.
Configure the size and positioning of the Hotkey Window
If you’ve just set up the hotkey window without changing other settings, you’ll just have a convenient way to pull up a typical floating window. However, if you’d like to get the Master Chief / Iron Man / TRON / HUD-style slide-down Hotkey Window, there’s one or two more steps.
- To adjust your window location, find the setting at Profiles > Window > Style. I find that the nicest option is “Full-Width Top of Screen.”
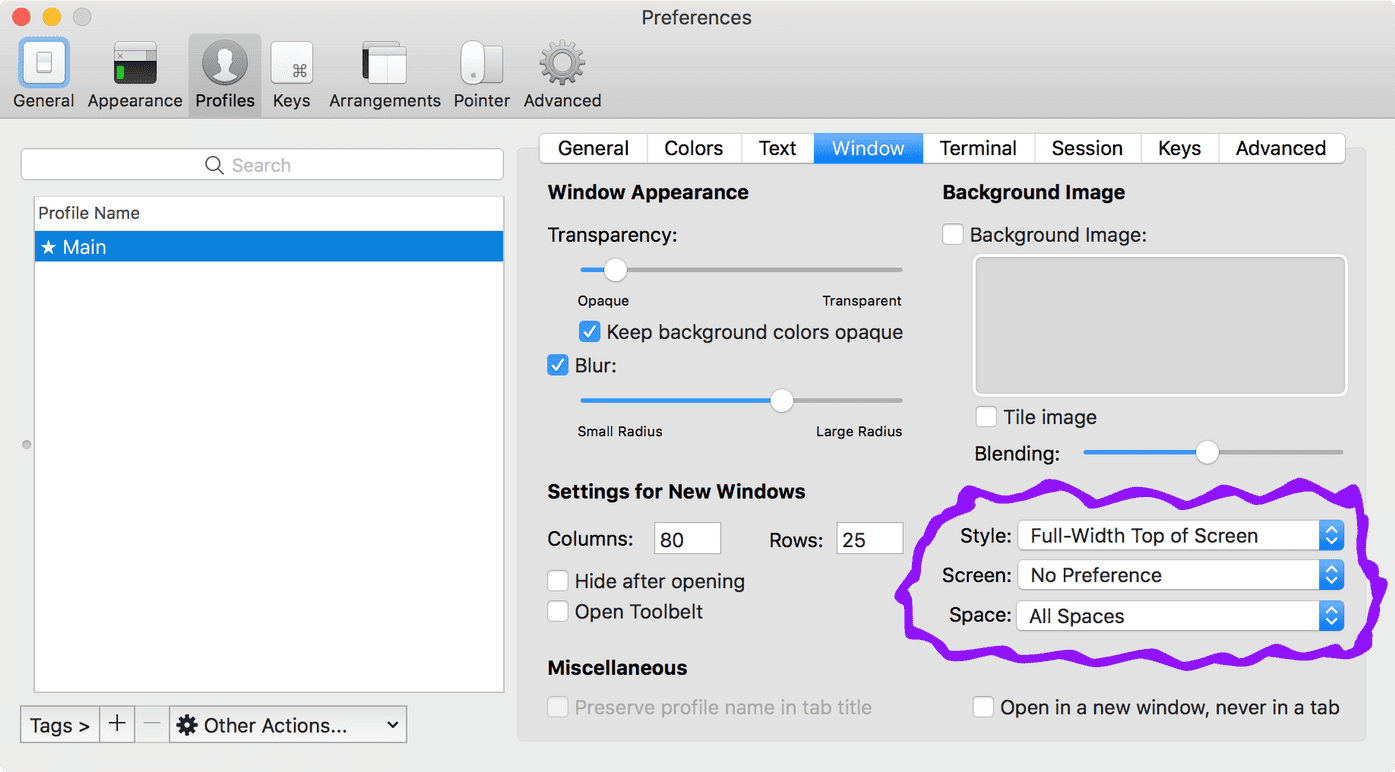
Note: when iTerm is open, command+enter will toggle a full-screen mode, regardless of your Window Style. This can be surprising if you don’t expect it.
-
Optional Step: in this same Window settings panel, it’s also possible to enable a touch of Transparency plus a generous background Blur. I think it’s aesthetically pleasing and helps reinforce the feeling of an always-in-context terminal, but I recognize that this look might not be for everyone. You could even set a background image, but I’ve only ever found that useful for gently trolling my classmates and coworkers by pulling up their face on my computer.
-
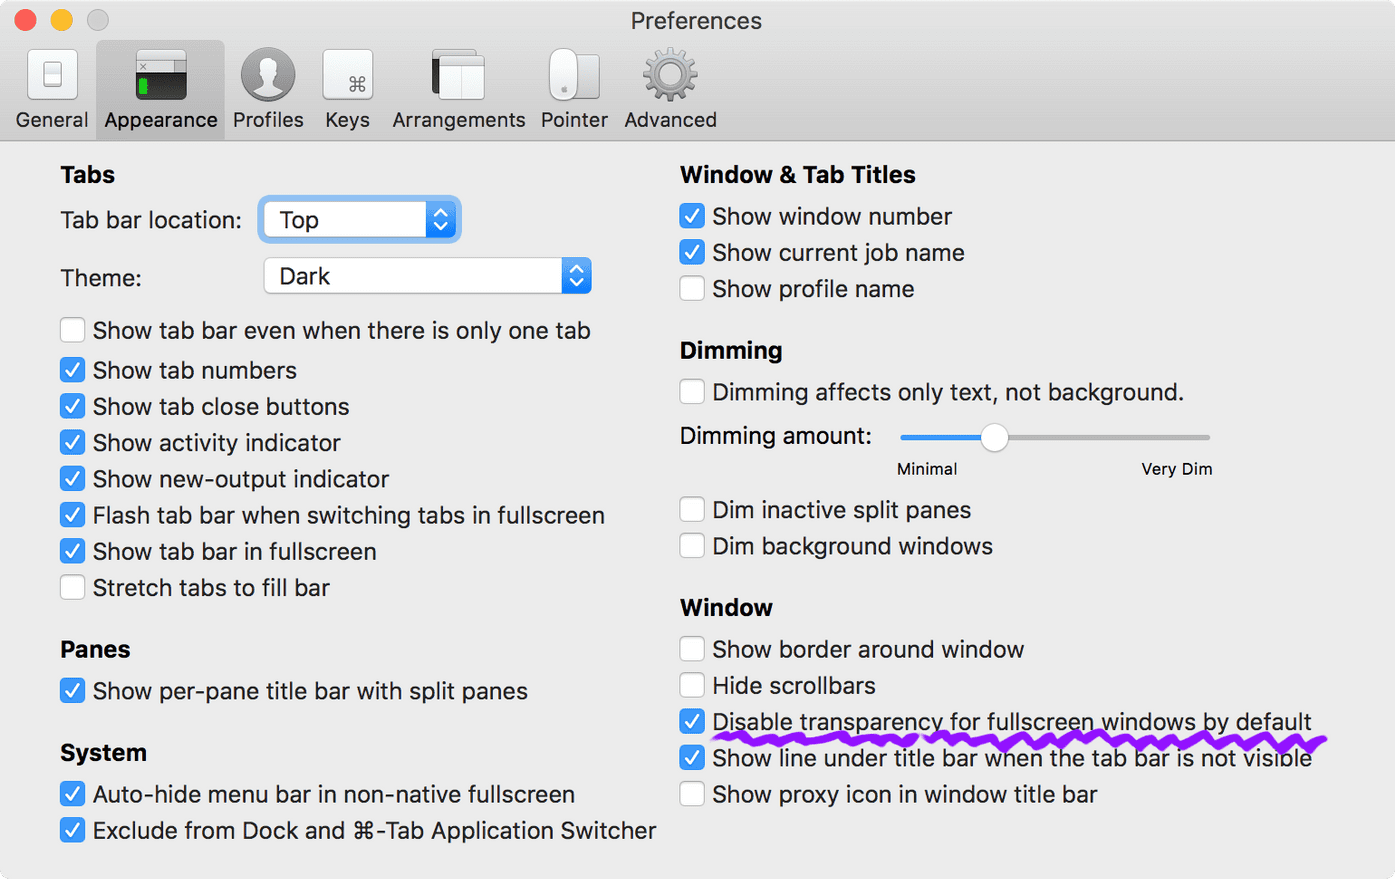
Optional option: if you want to read logs or help documentation in the terminal, you probably want to fully pay attention. For that reason, if you do make the Hotkey Window transparent, make sure that fullscreen mode is opaque. Do this by going to Appearance (this is global, not under Profiles, but don’t ask me why) and in the Window options, and making sure that the box is checked next to “Disable transparency for fullscreen windows by default.”
Give yourself a better text cursor
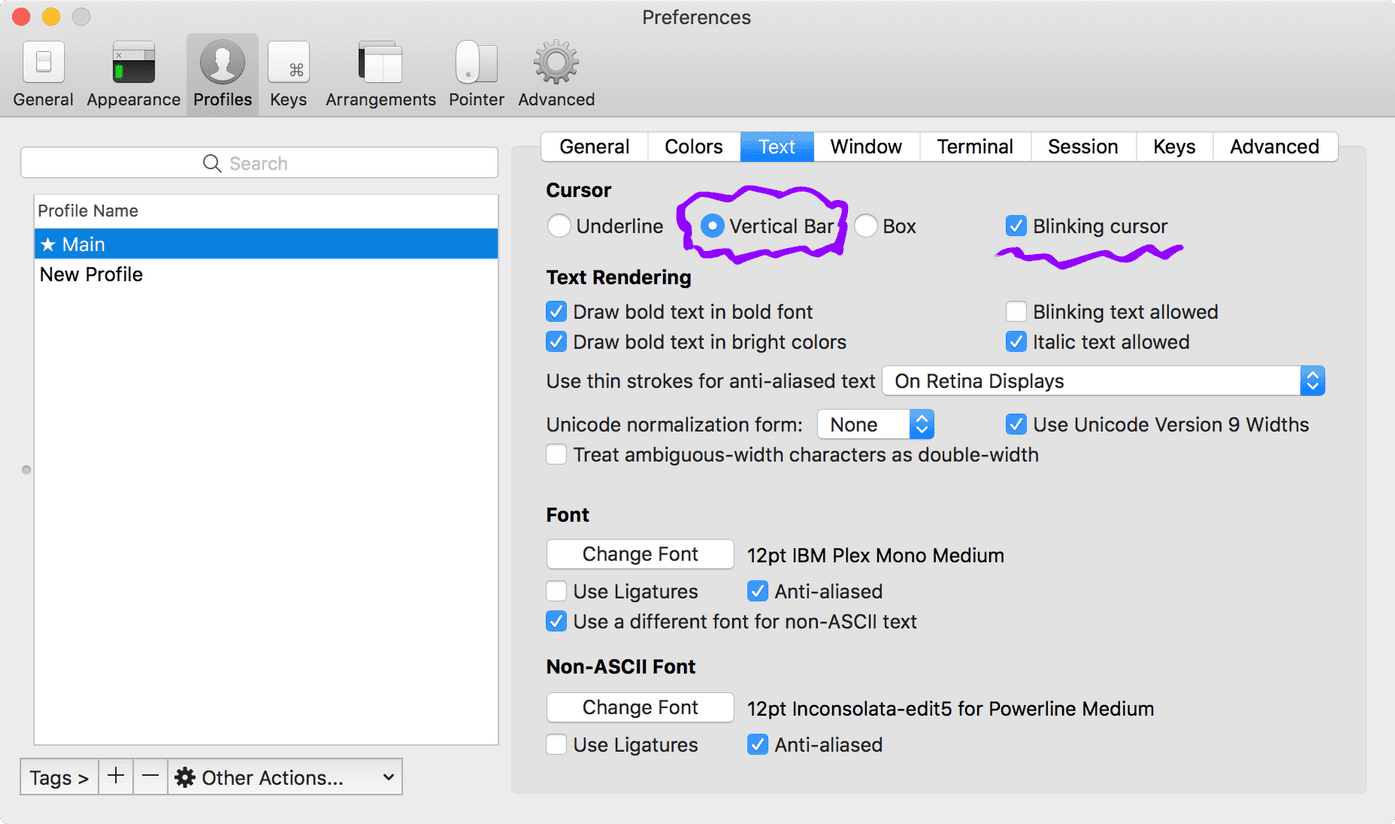
Something a lot of new terminal users are thrown off by is that the cursor is a character-wide rectangle, and it edits the left side of itself, rather than the character it is highlighting. I’m guessing that many people who are used to this have justified it in their brains and think it’s natural enough. However, if something causes a consistent delay (however momentary) in the very basic function of knowing your input location, I say it’s a fucking terrible design. Luckily, it’s easy to change back to the more-familiar, better-designed, blinking vertical bar.
To change the cursor in iTerm, simply go to the Text tab of your Profile, then in the Cursor section select “Vertical Bar” and check “Blinking cursor.”
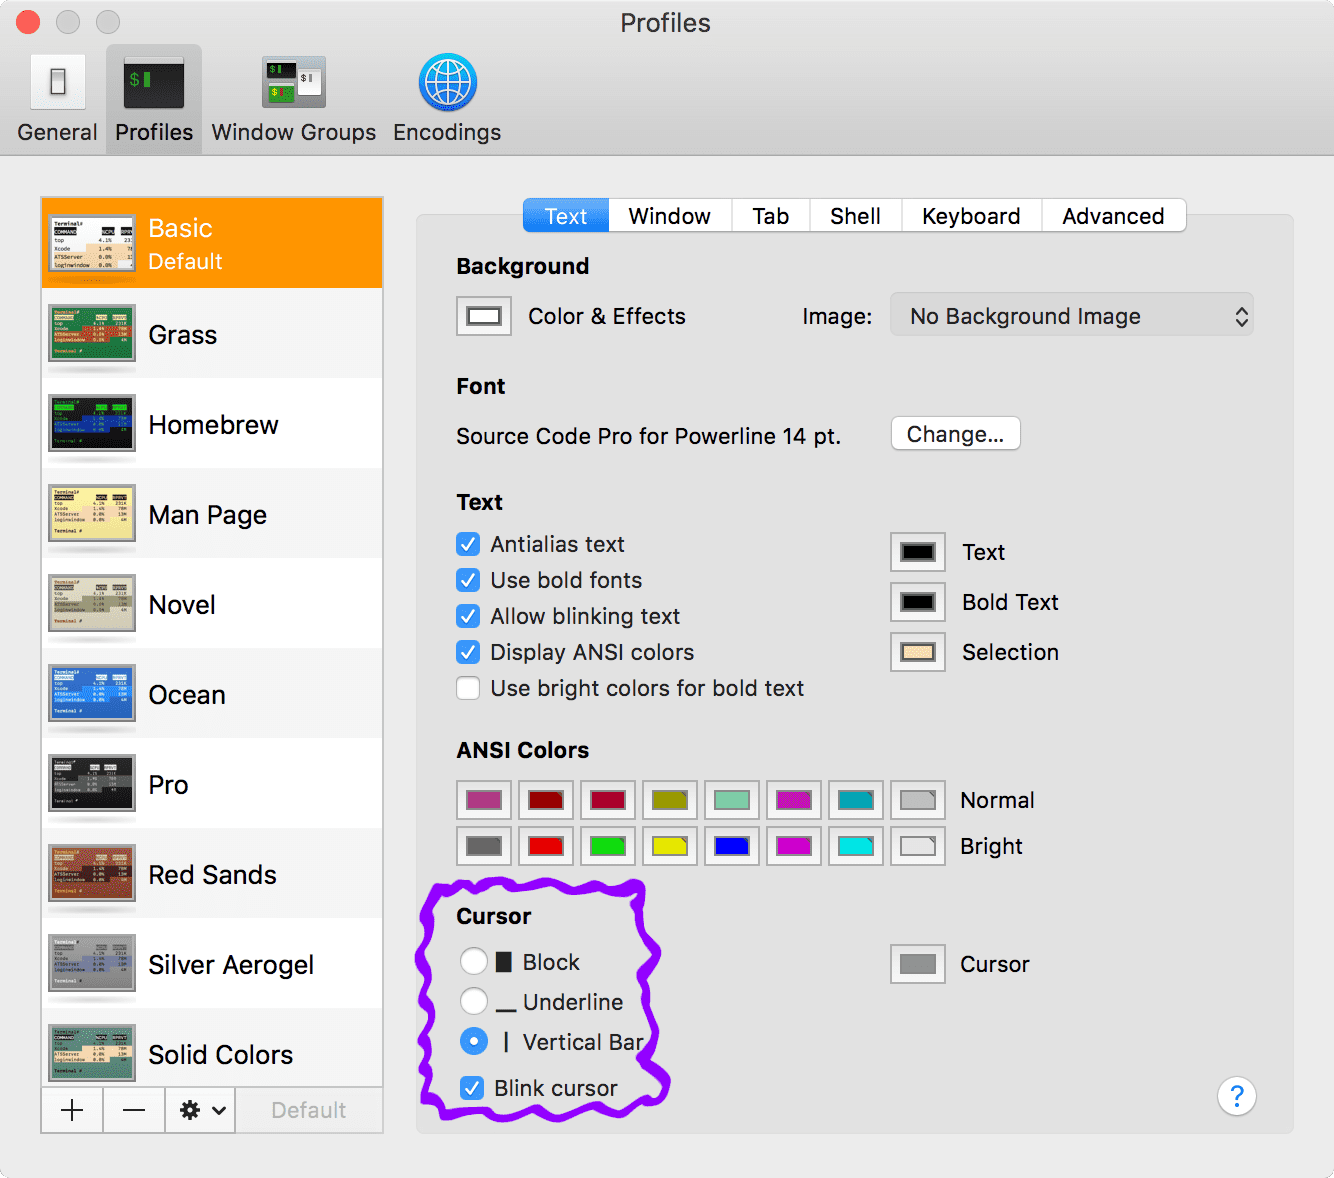
In fact, this is also simple to change in the basic macOS Terminal app. The option is under Profiles > Text > Cursor. If you are teaching someone to use the terminal for the first time, it might be worth helping them to adjust this so they don’t get needlessly tripped up later on.
Make text selectable with modifier keys
It was a revelation when I learned that modifier keys allowed me to travel around and select text with extra efficiency. If you work with text a lot, you probably already know about these, but briefly:
- Holding option (
⌥) and hitting a left/right arrow key moves the cursor left/right, a word at a time - Holding command (
⌘) while hitting left/right arrows allows you to move to the beggining/end of the current line of text - Holding shift (
⇧) allows you to select the text you move the cursor across with arrow keys, including with option and command modifiers.
It was annoying to me, then, that my efficient text maneuvering didn’t happen in the terminal. I know the terminal is from an earlier time, but does it still need to feel like the 1980s? No!
Set option + arrow keys to move by whole words
- Go to iTerm Preferences > Profiles > Keys
- Click the
+button to add in a key mapping - You will be adding in “hex codes” that connect key combo presses to actions in iTerm. The process is click to set your key combo, selecting “Send Hex Code” from the list of possible actions, and entering a specific code. There are a few more codes available on this Stack Overflow thread, but I find the most useful to be these:
Move cursor to beginning of line
⌘+← & Send Hex Codes: 0x01
Move cursor to beginning of line
⌘+→ & Send Hex Codes: 0x05
Move cursor left by one word
⌥+← & Send Hex Codes: 0x1b 0x62
Move cursor right by one word
⌥+→ & Send Hex Codes: 0x1b 0x66
Enable “undo” (useful if you type or paste in the wrong command)
⌘+z & Send Hex Codes: 0x1f
- Some of these may clash with existing key mappings. If they aren’t working, go to Preferences > Keys and delete mappings that use the same key combos.
Enable command+shift+arrow keys for selection of lines:
- Profiles > Keys > [Add]
- Enter in
⌘+⇧+← - Select the action “Move Start of Selection Back”
- Select the option “Move by line”
- Then, make sure there isn’t a global hotkey overriding this.
…And do the reverse for moving the end of text selection forward.
A caveat to selecting whole lines: if you are in the standard bash shell or most ZSH themes, you will also be selecting whatever text is in front of your entered commands. So, if you enter banner hello and select the line, you will be selecting something like bash-3.2$ banner hello. If you find a better way to do this, let me know!
Add aliases to speed up frequent tasks
It’s easy to set up “aliases” – key words that map to bigger commands – in the terminal. Check out my post Make the macOS command line super convenient with aliases if you’re interested.
Go further: Install zshell to get better theming and more conveniences
If you want to make your terminal even nicer, you can install Zshell, find a good theme, and use powerline fonts to really customize things. A solid course covering this and more is available in a Wes Bos video course at https://commandlinepoweruser.com/ (it’s free, and Wes Bos tutorials are great in general).
Happy commanding
Thanks for reading. If you have any questions, if you found this useful, or even if you just spot a typo, let me know on Twitter!